Ever wondered how to control your Raspberry Pi remotely? Well, buckle up because this guide is about to blow your mind. Whether you’re a tech enthusiast, a DIY hobbyist, or just someone looking to expand their skills, remote access to your Raspberry Pi opens up endless possibilities. From running servers to automating your home, controlling your Raspberry Pi from anywhere is a game-changer. Let’s dive in and explore how you can make this happen without breaking a sweat.
Imagine being able to access your Raspberry Pi from your phone, laptop, or even another Raspberry Pi. Sounds cool, right? With the right tools and a bit of know-how, you can turn your Raspberry Pi into a remote powerhouse. Whether you’re troubleshooting, managing files, or running scripts, remote control gives you the flexibility to do it all from the comfort of your couch—or even halfway around the world.
This guide isn’t just another tech tutorial. It’s your ultimate companion to mastering remote access on Raspberry Pi. We’ll cover everything from setting up SSH and VNC to using cloud services and third-party apps. By the end of this, you’ll be controlling your Raspberry Pi like a pro. So grab a coffee, and let’s get started!
Why Should You Control Your Raspberry Pi Remotely?
Controlling your Raspberry Pi remotely isn’t just a fancy feature—it’s a necessity. Think about it: who wants to sit in front of a tiny screen with a keyboard and mouse when you can manage everything from your smartphone or laptop? Here are a few reasons why remote control is a must-have:
- Convenience: Access your Raspberry Pi from anywhere without needing physical access.
- Efficiency: Streamline tasks like file management, server monitoring, and script execution.
- Flexibility: Work on projects remotely, whether you’re at home, at work, or on vacation.
- Cost-Effective: Reduce the need for additional hardware like monitors and keyboards.
Whether you’re setting up a home automation system, running a web server, or experimenting with IoT devices, remote access makes everything easier. Let’s break down the methods to achieve this magic.
Setting Up SSH for Remote Access
SSH, or Secure Shell, is one of the most popular methods for controlling your Raspberry Pi remotely. It’s secure, reliable, and super easy to set up. Here’s how you can get started:
Step 1: Enable SSH on Your Raspberry Pi
To enable SSH, you’ll need to access your Raspberry Pi’s settings. Follow these steps:
- Open the Raspberry Pi Configuration tool by typing
sudo raspi-configin the terminal. - Navigate to the “Interfacing Options” menu and select SSH.
- Choose “Yes” to enable SSH and hit Enter.
That’s it! SSH is now enabled on your Raspberry Pi. Next, let’s find out its IP address.
Step 2: Find Your Raspberry Pi’s IP Address
To connect to your Raspberry Pi remotely, you’ll need its IP address. Type ifconfig in the terminal and look for the “inet” address under the wlan0 or eth0 section. This is the IP address you’ll use to connect.
Step 3: Connect Using an SSH Client
Now that SSH is enabled and you have the IP address, it’s time to connect. You can use tools like PuTTY (for Windows) or simply open the terminal on macOS/Linux and type:
ssh pi@your_pi_ip_address
Enter the default password (usually “raspberry”) and voilà! You’re now connected to your Raspberry Pi remotely.
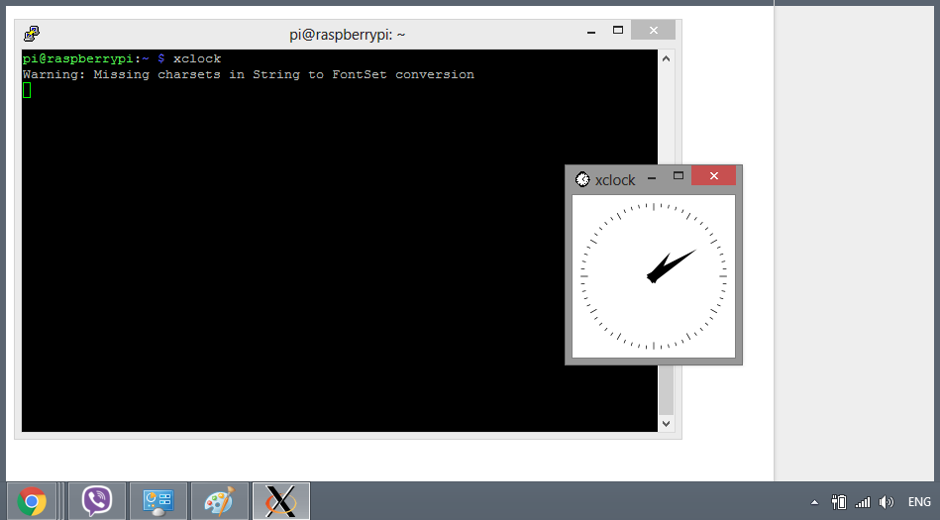
Using VNC for Graphical Remote Access
While SSH is great for command-line tasks, what if you want to access the full graphical interface of your Raspberry Pi? That’s where VNC comes in. VNC allows you to remotely control your Raspberry Pi as if you were sitting right in front of it.
Step 1: Install VNC Server
To set up VNC, you’ll need to install the VNC server on your Raspberry Pi. Run the following commands in the terminal:
sudo apt update sudo apt install realvnc-vnc-server realvnc-vnc-viewer
Step 2: Enable VNC
Once installed, enable VNC by opening the Raspberry Pi Configuration tool (sudo raspi-config) and navigating to the “Interfacing Options” menu. Select VNC and choose “Yes” to enable it.
Step 3: Connect Using a VNC Viewer
Download the VNC Viewer app on your computer or smartphone and enter your Raspberry Pi’s IP address. Log in using the same credentials you use for SSH, and you’ll have full graphical access to your Raspberry Pi.
Securing Your Remote Connections
Security is key when controlling your Raspberry Pi remotely. Here are some tips to keep your setup safe:
- Change the default password to something strong and unique.
- Use a firewall to restrict access to only trusted IP addresses.
- Enable two-factor authentication for added security.
- Keep your software and firmware up to date to protect against vulnerabilities.
By following these best practices, you can enjoy the convenience of remote access without compromising your system’s security.
Connecting Through Cloud Services
What if you want to access your Raspberry Pi from anywhere in the world, not just your local network? Cloud services like ngrok and Resin.io make this possible. Here’s how:
Using ngrok for Temporary Access
ngrok is a handy tool that creates a secure tunnel to your Raspberry Pi, allowing you to access it from anywhere. To use ngrok, follow these steps:
- Download and install ngrok on your Raspberry Pi.
- Run the command
./ngrok tcp 22to create a tunnel for SSH. - Use the public URL provided by ngrok to connect to your Raspberry Pi remotely.
ngrok is perfect for temporary access but isn’t ideal for long-term use due to its limitations.
Using Resin.io for Persistent Access
Resin.io (now called BalenaCloud) offers a more robust solution for remote access. It allows you to manage and deploy applications on your Raspberry Pi from anywhere. Sign up for a free account, connect your Raspberry Pi to the platform, and start controlling it remotely in no time.
Troubleshooting Common Issues
Even with the best setup, things can go wrong. Here are some common issues you might encounter and how to fix them:
Issue 1: Unable to Connect via SSH
If you can’t connect to your Raspberry Pi via SSH, check the following:
- Ensure SSH is enabled on your Raspberry Pi.
- Verify that the IP address is correct.
- Check your network connection and firewall settings.
Issue 2: VNC Connection Fails
If VNC isn’t working, try these troubleshooting steps:
- Make sure the VNC server is installed and running.
- Check that VNC is enabled in the Raspberry Pi Configuration tool.
- Restart your Raspberry Pi and try again.
Advanced Tips for Power Users
Ready to take your remote control skills to the next level? Here are a few advanced tips for power users:
- Set up port forwarding on your router for easier access from outside your network.
- Use a dynamic DNS service to assign a memorable domain name to your Raspberry Pi.
- Automate tasks using scripts that run on a schedule or triggered by events.
These tips will help you streamline your workflow and make the most out of your Raspberry Pi.
Real-World Applications of Remote Raspberry Pi Control
Now that you know how to control your Raspberry Pi remotely, let’s explore some real-world applications:
Home Automation
Use your Raspberry Pi to control smart devices, monitor energy usage, and automate routines in your home. With remote access, you can manage everything from anywhere.
Web Hosting
Set up a web server on your Raspberry Pi and control it remotely to host your website or personal projects.
IoT Projects
Build IoT devices and control them from your Raspberry Pi. Whether it’s a weather station, security system, or automation hub, remote access makes it all possible.
Conclusion: Take Control of Your Raspberry Pi Today!
Controlling your Raspberry Pi remotely is easier than you think. With SSH, VNC, and cloud services at your disposal, you can manage your projects from anywhere in the world. Remember to prioritize security and explore advanced features to unlock the full potential of your Raspberry Pi.
So what are you waiting for? Start experimenting with remote access today and take your Raspberry Pi projects to the next level. Don’t forget to share this guide with your friends and leave a comment below if you have any questions or feedback. Happy tinkering!
Table of Contents
Why Should You Control Your Raspberry Pi Remotely?
Setting Up SSH for Remote Access
Using VNC for Graphical Remote Access
Securing Your Remote Connections
Connecting Through Cloud Services